How to Make Mini-Cheesecakes the Easy Way
Mar 6, 2024
One of the most beloved desserts for many people is cheesecake. The creamy, delicious dessert is an indulgence that many people choose when they go out to eat. Just the photo of a slice of cheesecake is enough to get one’s mouth watering. But to make it at home can often be a problem, because for a cheesecake you have to worry about having a water bath. However, I have some information that will change your life and allow you to eat cheesecake anytime you want.
A Different Way to Make Cheesecake
I discovered this incredible secret a few years ago, and since then I have been requested to make this dessert for many family occasions. Instead of making a regular sized cheesecake, I make them in my muffin tin.
Benefits of Making Mini Cheesecakes
- No water bath needed – One of the biggest drawbacks of making regular sized cheesecake is that they require a water bath. But no water bath is needed for mini cheesecakes. All you need is the ingredients, muffin tin liners, and an oven.
- Perfect Portions – Cheesecakes are so rich that it’s often difficult to finish the whole slice. But these little bites of deliciousness are just the right size.
- Easy to Make Enough – When you make a regular cheesecake, you’re never sure if you’ll have enough. But with mini cheesecakes you can make as many or as few as you think you’ll need. The only problem is that some might want to eat more than one!
Now that we have gone over the benefits of mini cheesecakes, I’m going to share some of my favorite recipes for mini cheesecakes.
Plain Mini Cheesecakes
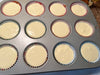
This first recipe is for plain mini cheesecakes. These cheesecakes are perfect for any occasion, whether you are having guests over for dinner and you’re looking for something tasty to have with coffee or you want something to take for a potluck dinner.
These cheesecakes’ crust is made from graham crackers. This can be made with cracker crumbs, melted butter, and sugar, though I often leave the sugar out of the crust because to me it’s sweet enough. I also buy the crumbs instead of breaking up the graham crackers myself. I find it much easier.
Ingredients & Notes
- Cream cheese – Full fat will give you the best flavor. You also can use reduced fat, but fat-free isn’t a good idea. I have used reduced fat and they turned out fine!
Sour Cream – This helps to break down your cream cheese and makes the filling creamier. Greek yogurt (plain) can also be used. - Sugar and Vanilla – These cheesecakes have sugar in them to sweeten them and they’re flavored with vanilla.
- Eggs – Eggs help with giving your cheesecake structure.
Recipe for Mini Cheesecakes
Crust Ingredients
- 1 cup of graham crackers (crumbs)
- 3 tablespoons granulated sugar
- 3 ½ tablespoons of unsalted melted butter
Ingredients for Filling
- 2 bricks of room-temperature cream cheese
- 1/3 cop of room temperature sour cream
- ½ cup of granulated sugar
- 1 teaspoon of vanilla extract (pure)
- 2 large room-temperature eggs
INSTRUCTIONS
For Crust
- Preheat your oven to 325°F and line your muffin tin using cupcake liners. Set it aside.
- In a big mixing bowl, mix your crumbs and sugar. Add in your melted butter, mixing until your crumbs are all moist. Distribute your mixture together to all of your liners and then press them down firmly in an even layer. I find that a small juice glass is just the right size for doing this.
- Bake the crust at 325 for just 5 minutes. Remove them from the oven and put them aside. Keep your oven’s temperature at 325.
Cheesecake Filling
- In a large bowl of your stand mixer with its paddle attachment or in a big mixing bowl with a handheld mixer, mix your sour cream and cream cheese until the mixture’s creamy and smooth. Add the vanilla extract and sugar and then mix until it's fully combined. Stop occasionally to scrape down your bowl’s sides as needed. Mix your eggs in, one and then the other, on your mixer’s low speed, just until they’re combined.
- Distribute your batter evenly between your liners in your muffin tin. Fill each of them until they’re almost full.
- Bake the cheesecakes at 325 for 17 to 20 minutes, or when your cheesecakes’ tops are set.
- Remove your cheesecakes from your oven and let them call in your pan for an hour. Remove them carefully from your pan and chill them in airtight containers for a minimum of 3 to 4 hours or overnight.
- Remove from the oven and allow to cool in the pan for 1 hour. Carefully remove from the pan and chill in an airtight container in the refrigerator for 3-4 hours or overnight.
Potential Toppings
These cheesecakes are delicious the way they are, and that’s how we prefer them. But if you’d like to add something more to them, here are a few options.
- Blueberry sauce
- Cherries
- Chocolate ganache or syrup
- Dulce de Leche
- Lemon curd
- Raspberry sauce
- Salted caramel or regular caramel sauce
- Strawberry sauce
- Whipped cream
NOTES
- If you have leftovers, you can store them in airtight containers for as many as 4 days in your fridge.
- You can freeze them for as long as 3 months. To eat them after they’re frozen, thaw the cheesecakes overnight in your fridge.
- For the crumbs, you can buy them. But if you can’t find crumbs, you can buy sheets of graham crackers – 8 sheets will make a cup.
- Purchase cream cheese bricks rather than the cream cheese that’s sold in tubs. Philadelphia cream cheese gives the best flavor.
- For your sour cream, it’s best to use the full-fat. Plain Greek yogurt also can be substituted.
- If you forget to take the eggs out, putting them in warm water for 5 to 10 minutes will bring them up to the right temperature. But keep an eye on them, since you don’t want them to cook.
- Don’t overmix your eggs. Doing this will put too much air in your batter and your cheesecakes can crack.
Frequently Asked Questions
How can You Tell the Cheesecakes are Done?
You will notice that the tops of the cheesecakes are puffing up in your oven and appear set. Their edges should be set completely. However, their centers will still be a big jiggly. Your cheesecakes will continue settings as they’re cooling and after they’re in the refrigerator.
Can They be Frozen?
They freeze very well. They can be frozen in a freezer-friendly bag or container for as long as 3 months. Simply thaw them in your fridge overnight.
Can These be Made with Mini Cheesecake Pans?
They can be made with this type of pan. However, since the spots are smaller than muffin tins, it’s best to make 16 in your pan rather than 12 using this recipe.
Mini Chocolate Cheesecakes
Now that you know how to make regular mini cheesecakes, I’m going to share one of my favorite mini chocolate cheesecake recipes.
I love these cheesecakes because they’re really simple to make. With a creamy, smooth filling put on top of a crust made with Oreo cookies and topped with chocolate ganache, they’re a chocolate lover’s dream!
Crust Ingredients
- 1 cup of crumbs from Oreo cookies
- 2 tablespoons of melted unsalted butter
Ingredients for Cheesecake
- 12 ounces of room-temperature cream cheese
- ½ cup of sugar
- 2 tablespoons of natural cocoa powder, unsweetened
- ¼ cup of room-temperature sour cream
- ½ teaspoon of vanilla extract
- 2 large room-temperature eggs
- 4 ounces of bittersweet or semisweet chopped and melted chocolate
Ingredients for Chocolate Ganache
- 3 ounces of chocolate chips (semi-sweet)
- ¼ cup of heavy whipping cream
Homemade Whipped Cream Ingredients
- ¾ cup of cold heavy whipping cream
- 3 tablespoons of powdered sugar
- 3 tablespoons of natural cocoa powder (unsweetened)
- ½ teaspoon of vanilla extract
Instructions
- Preheat your oven to 325. Add liners to your muffin tin.
- Combine your cookie crumbs and your melted butter. Divide this mixture between your liners and press it into your pan’s bottoms.
- Bake the crusts for 5 minutes and remove them from your oven. Let them cool while the filling is being made.
- Reduce your oven’s temperature to 300.
- In a big bowl, beat your cocoa powder, cream cheese, and sugar on low speed until it’s combined well. The low speed will keep air from going into your batter, which can cause cracks. Scrape your bowl’s sides.
- Add your vanilla extract and sour cream. Beat this on low until it’s combined well.
- Add your eggs individually. Beat slowly and scrape your bowl after each is added.
- Stir in your melted chocolate.
- Add your filling to each of your cups until the cups are almost completely full.
- Bake your cheesecakes for 15 minutes, and then turn the oven off and leave your oven door closed for a further 10 minutes.
- Crack open the door and let your cheesecakes cool for 15 to 20 minutes. Then put them in the refrigerator to complete cooling. When your cheesecakes are totally cool, remove them from your pan.
- Put the chocolate chips that you have for your ganache into a small bowl. Heat your whipping cream just enough until it starts boiling.
- Pour your cream over your chocolate chips, then whisk the mixture until the chips are melted & smooth.
- Add a little of the ganache to each of your cheesecake tops.
- To make your whipped cream, add your whipping cream, cocoa powder, vanilla, and powdered sugar to a big bowl. Then whip the mixture on high until you see stiff peaks forming.
- Pipe the whipped cream onto each cheesecake. You then can top it with a small bit of chocolate or even with a strawberry or raspberry.
- The cheesecakes should be refrigerated until you’re about to serve them. They’re best when you keep them covered well and eaten within 3 to 4 days.
Well, I hope you enjoyed these two recipes for some tasty and bite-sized mini cheesecakes. Keep following my blog for more recipes and more tips!